

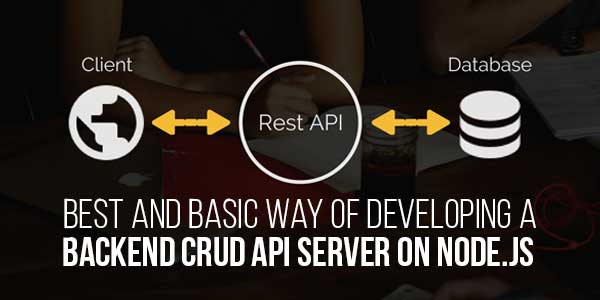
Creating a backend CRUD (Create, Read, Update, Delete) API server is one of the fundamental tasks for any developer. Node.js, with its non-blocking architecture, is a powerful choice for building fast and scalable API servers. This guide will take you through the best and most basic way to develop a backend CRUD API server using Node.js.
Table of Contents
Introduction To Node.js And CRUD Operations:
Node.js is a popular, open-source, cross-platform JavaScript runtime environment that allows developers to build server-side and networking applications. It’s known for its event-driven architecture, which ensures asynchronous I/O, making it suitable for building high-performance applications.
CRUD operations are the four basic functions of persistent storage, and they are essential to the design of any application that requires database interaction. CRUD stands for:
- Create: Adding new data
- Read: Retrieving existing data
- Update: Modifying existing data
- Delete: Removing data
In this blog post, we will develop a simple CRUD API server using Node.js. We will cover the installation, project setup, routing, database integration, and testing.
Setting Up The Development Environment:
Before diving into coding, it’s important to have your development environment set up correctly.
Installing Node.js And npm:
To start with Node.js, you need to have it installed on your system. Node.js comes with npm (Node Package Manager), which is used to install libraries and frameworks.
- Download Node.js from Node.js Official Website.
- Follow the installation instructions for your operating system.
- Verify the installation by running the following commands in your terminal:
node -v
npm -v
These commands should return the version numbers of Node.js and npm, respectively.
Setting Up A New Node.js Project
Once Node.js is installed, you can create a new project directory:
- Create A Project Directory:
mkdir my-crud-api
cd my-crud-api
- Initialize npm:
Initialize the project with npm, which will create a package.json file to manage your project’s dependencies.
npm init -y
The -y flag automatically fills in the default settings.
Installing Essential Packages:
For our CRUD API, we’ll need some essential npm packages:
- Express.js: A minimal and flexible Node.js web application framework that provides a robust set of features for web and mobile applications.
- Mongoose: A MongoDB object modeling tool designed to work in an asynchronous environment.
- dotenv: A module to load environment variables from a .env file.
- body-parser: A middleware to parse incoming request bodies in a middleware before your handlers, available under the req.body property.
Install these packages by running:
npm install express mongoose dotenv body-parser
Building The Basic Server:
With the environment set up, it’s time to start building our server.
Creating The Server File:
Create a new file named server.js in the root of your project directory:
touch server.js
Open server.js in your favourite text editor and start with the following code:
const express = require('express');
const mongoose = require('mongoose');
const bodyParser = require('body-parser');
require('dotenv').config();

const app = express();
const port = process.env.PORT || 3000;

app.use(bodyParser.json());

// Basic Route
app.get('/', (req, res) => {
    res.send('Welcome to the Node.js CRUD API Server');
});

app.listen(port, () => {
    console.log(`Server is running on http://localhost:${port}`);
});
Running The Server:
Before running the server, create a .env file to store your environment variables, especially the PORT:
PORT=3000
Now, start the server by running:
node server.js
Your server should be running, and you can access it by navigating to http://localhost:3000 in your browser.
Connecting To MongoDB:
For our CRUD operations, we’ll use MongoDB as our database.
Setting Up MongoDB:
If you don’t have MongoDB installed locally, you can either:
- Install MongoDB locally: Follow the instructions on the official MongoDB website.
- Use MongoDB Atlas: A cloud-based solution that’s easy to set up.
After setting up MongoDB, you should have a MongoDB URI, which you’ll store in the .env file:
MONGO_URI=mongodb://localhost:27017/mycrudapi
Connecting Mongoose To MongoDB:
Now, update the server.js file to connect Mongoose to your MongoDB database:
mongoose.connect(process.env.MONGO_URI, { useNewUrlParser: true, useUnifiedTopology: true })
    .then(() => console.log('MongoDB connected successfully'))
    .catch(err => console.log('MongoDB connection error:', err));
With this, your Node.js server is now connected to MongoDB.
Defining The Data Model:
Now that we have MongoDB connected, let’s define a data model for our CRUD operations.
Creating The Model Directory And File:
Create a models directory in the root of your project and inside it, create a file named Item.js:
mkdir models
touch models/Item.js
Defining The Schema:
In models/Item.js, define a simple schema for an item with properties like name and price:
const mongoose = require('mongoose');

const ItemSchema = new mongoose.Schema({
    name: {
        type: String,
        required: true,
    },
    price: {
        type: Number,
        required: true,
    }
});

module.exports = mongoose.model('Item', ItemSchema);
This schema defines the structure of the documents within the items collection in your MongoDB database.
Implementing CRUD Operations:
With the model in place, it’s time to implement the CRUD operations.
Setting Up Routes:
Create a new directory called routes in the root of your project and create a file named itemRoutes.js:
mkdir routes
touch routes/itemRoutes.js
In itemRoutes.js, define the routes for CRUD operations:
const express = require('express');
const router = express.Router();
const Item = require('../models/Item');

// Create Item
router.post('/items', async (req, res) => {
    try {
        const newItem = new Item(req.body);
        const savedItem = await newItem.save();
        res.status(201).json(savedItem);
    } catch (err) {
        res.status(400).json({ message: err.message });
    }
});

// Read All Items
router.get('/items', async (req, res) => {
    try {
        const items = await Item.find();
        res.json(items);
    } catch (err) {
        res.status(500).json({ message: err.message });
    }
});

// Read Single Item
router.get('/items/:id', async (req, res) => {
    try {
        const item = await Item.findById(req.params.id);
        if (!item) return res.status(404).json({ message: 'Item not found' });
        res.json(item);
    } catch (err) {
        res.status(500).json({ message: err.message });
    }
});

// Update Item
router.put('/items/:id', async (req, res) => {
    try {
        const updatedItem = await Item.findByIdAndUpdate(req.params.id, req.body, { new: true });
        if (!updatedItem) return res.status(404).json({ message: 'Item not found' });
        res.json(updatedItem);
    } catch (err) {
        res.status(400).json({ message: err.message });
    }
});

// Delete Item
router.delete('/items/:id', async (req, res) => {
    try {
        const deletedItem = await Item.findByIdAndDelete(req.params.id);
        if (!deletedItem) return res.status(404).json({ message: 'Item not found' });
        res.json({ message: 'Item deleted successfully' });
    } catch (err) {
        res.status(500).json({ message: err.message });
    }
});

module.exports = router;
Integrating Routes Into The Server:
To make these routes available in your application, import them into server.js and use them as middleware:
const itemRoutes = require('./routes/itemRoutes');

app.use('/api', itemRoutes);
Now, your API is ready to handle CRUD operations for the Item resource.
Testing The CRUD API:
After implementing the CRUD routes, it’s crucial to test them to ensure they work as expected.
Testing With Postman:
Postman is a popular tool for testing APIs. Here’s how you can test each CRUD operation:
- Create Item:
- Set the request type to POST.
- URL: http://localhost:3000/api/items
- Body: JSON format { “name”: “Item1”, “price”: 100 }
- Click “Send” to see the response.
- Read All Items:
- Set the request type to GET.
- URL: http://localhost:3000/api/items
- Click “Send” to see the list of items.
- Read Single Item:
- Set the request type to GET.
- URL: http://localhost:3000/api/items/<item_id>
- Click “Send” to see the specific item.
- Update Item:
- Set the request type to PUT.
- URL: http://localhost:3000/api/items/<item_id>
- Body: JSON format { “name”: “UpdatedItem”, “price”: 150 }
- Click “Send” to see the updated item.
- Delete Item:
- Set the request type to DELETE.
- URL: http://localhost:3000/api/items/<item_id>
- Click “Send” to delete the item.
Using Postman allows you to interact with your API in real time and ensure that each endpoint works correctly.
Error Handling And Validation:
Robust applications need to handle errors gracefully and validate data to avoid unexpected behaviours.
Implementing Error Handling Middleware:
Create an error-handling middleware in server.js to catch and respond to errors consistently:
app.use((err, req, res, next) => {
    console.error(err.stack);
    res.status(500).json({ message: 'Something went wrong!' });
});
This middleware should be placed after all other middleware and routes.
Adding Validation:
You can use Mongoose’s built-in validation features or other libraries like Joi to validate the incoming data before processing it.
For example, modifying the ItemSchema to include validation:
const ItemSchema = new mongoose.Schema({
    name: {
        type: String,
        required: [true, 'Item name is required'],
        minlength: [3, 'Name must be at least 3 characters long'],
    },
    price: {
        type: Number,
        required: [true, 'Item price is required'],
        min: [0, 'Price cannot be negative'],
    }
});
With these validations in place, Mongoose will automatically check the data against these rules before saving it to the database.
Securing The API:
Security is a crucial aspect of API development. Here are some basic security practices to follow:
Protecting Against SQL Injection:
Since we’re using MongoDB, the risk of SQL injection is mitigated, but you should still validate and sanitize input to prevent other types of attacks.
Implementing Authentication And Authorization:
For a production-ready API, you’ll want to implement authentication (verifying user identity) and authorization (controlling access to resources). Popular choices for authentication in Node.js include JWT (JSON Web Tokens) and OAuth.
Enabling HTTPS:
In a production environment, ensure your server uses HTTPS to encrypt data in transit.
Deployment And Maintenance:
After development, the next step is deployment and ongoing maintenance.
Deploying The API:
You can deploy your Node.js API server to various platforms, such as:
- Heroku
- AWS EC2
- DigitalOcean
- Vercel
Each platform has its deployment process, but it generally involves pushing your code to the platform’s repository and configuring environment variables.
Monitoring And Logging:
Use monitoring tools like PM2, New Relic, or Datadog to keep an eye on your server’s performance and uptime.
Implement logging with libraries like Winston or Morgan to track and diagnose issues in your application.
Regular Updates And Security Patches:
Keep your dependencies up to date to avoid security vulnerabilities. Tools like npm audit can help you identify and fix security issues in your project’s dependencies.
Conclusion:
Developing a backend CRUD API server with Node.js is a rewarding experience that lays the foundation for building more complex applications. This guide provided you with the basic steps, from setting up the development environment to deploying the server.
By following these best practices, you can create a robust, scalable, and secure API server. Remember that continuous learning and staying updated with the latest tools and practices are key to becoming a proficient backend developer.
Whether you’re building this API for a personal project or a production application, this guide should serve as a solid starting point.


Thanks for the article. Looking forward to reading more about domain SEO optimization.
Welcome here and thanks for reading our article and sharing your view. This will be very helpful to us to let us motivate to provide you with more awesome and valuable content from a different mind. Thanks again.