It’s a dream of every blogger that his blog should blink in the eyes of his readers, attractively. If content is the king, then Design is the palace and the royal palace must be decorated and varnished well ![]() . You can call a talented designer to design your castle, so as your blog. But in case of blog, you have to know some simple tricks that you can use to make it more attractive and a bit different. With CSS3, there are lots of such tricks, which can be easily implied even in blogger. Today we are going to talk about such a trick — How to add stylish Round corners to blogger themes/Widgets. So, Let’s start !
. You can call a talented designer to design your castle, so as your blog. But in case of blog, you have to know some simple tricks that you can use to make it more attractive and a bit different. With CSS3, there are lots of such tricks, which can be easily implied even in blogger. Today we are going to talk about such a trick — How to add stylish Round corners to blogger themes/Widgets. So, Let’s start !
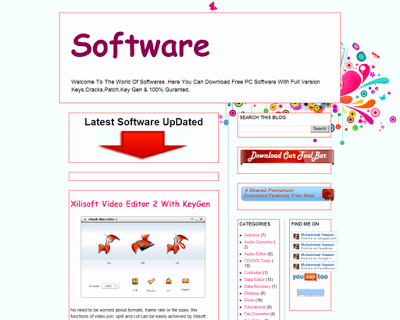
Some time your template is so simple that it can not attract visitors, so you have to spices up your blog, but after that time your blog gonna heavy day by day and visitors also dislike this. So now here is the middle way to design simple and stylish with easy and short coding. If you want to add borders you can also use this code, There are many different type of codes given below.But first have a look on both two image that are showing your before and after effect of this code.(This Is Not A Perfect Image)
By this useful article you teach that How you add Stylish and Handsome borders to free blog blogger gadgets, in my experience blogger gadgets is very useful and give attraction to your visitors and readers. If your blogger blog gadgets is beautiful your readers and visitors could be stay some time on your blogger blog. So now you are ready to give shades and stylish border to your blogger blog I am describing and and giving some tips to you see the following suggestion.
 |
| Before |
 |
| After |
Table of Contents
Features:
1.) It Will Change Your Desired Widget Background Only Not All.
2.) Simple Steps Wioth Easy Installation.
3.) Quick To Load And Awesome In Look.
4.) Pure CSS Code.
5.) 6 Different Style Is Provided Below.
6.) Fully Customizable.
How To Do This In Blogspot?
1.) For All Of These Code, You Have To Do Some Thing Like This.
2.) Go To Your www.blogger.com
3.) Open Your Desire Blog.
4.) Go To Layout.
5.) Click “Edit A Gadget” On Which You Want To Add Border.
6.) Get The “Gadget” ID Where You Want To Put This Code…(If You Don’t Know How To Get Widget ID Just Comment Below, I Will Explain You Easily)
7.) Open Edit HTML.
8.) Expand Your Widget.
9.) Find ]]></b:skin>
10.) And Paste The Below Code Just Before It.
For Simple Square Color Border:-
#YourWidgetID {
padding: 5px;
border: 1px solid #ff0000;
}
For Simple Square Color Border With Filled Background:-
#YourWidgetID {
padding: 5px;border: 1px solid #ff0000;background:#ffffff; }
For Simple Square Color Border With Filled Background And Shade:-
#YourWidgetID {
padding: 5px;border: 1px solid #ff0000;background:#ffffff;box-shadow: 3px 3px 3px #ff0000;}
For Simple Rounded Color Border:-
#YourWidgetID {
padding: 5px;border: 1px solid #ff0000; -moz-border-radius:6px; -webkit-border-radius:6px;}
For Simple Rounded Color Border With Filled Background:-
#YourWidgetID {
padding: 5px;border: 1px solid #ff0000; -moz-border-radius:6px; -webkit-border-radius:6px; background:#ffffff; }
For Simple Rounded Color Border With Filled Background And Shade:-
#YourWidgetID {
padding: 5px;border: 1px solid #ff0000; -moz-border-radius:6px; -webkit-border-radius:6px;background:#ffffff;box-shadow: 3px 3px 3px #ff0000; }
Customization:
1.) Change “#YourWidgetID” With Your Desired Widget ID.
2.) You Can Also Change The CSS With Your Desire.
3.) Save And Done.


Thanks……..Plz tell me about Widget ID…….
You Are Welcome, You Can Get Your WidgetID While Opening Gadget POPUP From The URL’s End…
Great post.
I am interested to using this in my blog.
You Are Welcome Here, Thanks For Using…
perfect for my blog….great work admin..thanks
You Are Welcome…
I ma not able to find my gadget Id plz help..
Read Here How To Get The Gadget ID…
https://www.exeideas.com/2011/11/how-to-easily-create-sitemap-for.html
I’m not able to identify the gadgets id
@Haja…
What’s The Problem…???
thanks for the post
You Are Welcome…
Amazing.. you have sorted my problem. 10/10
Thanks…
i want rounded corner in my post including post title please help
thanks
Just Change
#YourWidgetID
To
.post
In The Above Codes…
Great site. I am loving it. This site helps to learn great tricks . I am going to use this border technique on my blog. Great. Keep it up admin.
You Are Welcome To Visit Us…
Didn’t work in my blog bro..BLOGGER Tips and Tricks! can you help me..
Thanks!
You Have Third Party Template, Just Send Us Your XML File To Get The Code…
How to add a stylish border in each gadget or how edit in html code or i dont understand that proces that how to add border..pls info.me
You Have To Copy Paste This Code And Change Only Your Widget ID On Which You Want Borders…
Hi! Thanks for the info! I had added a border around my main blog column, where I post the pictures (id: Blog1) using your code a while ago and now I am looking to remove it. I thought that just by removing the bit from the HTML code would do the trick but it hasn’t changed. Can you tell me if I can do it with CSS? This is my website: http://www.notyouraveragestylefix.com/
Find The Below CSS In Your Template And Delete It…
#Blog1 {
padding: 5px;
border: 1px solid #000000;
}
How to know gadget ID please tell me in brief
First Open Your Desired Widget From Layout Tab Of Blogger. Now Check The POPUP Of Widget Editing AddressBar And Go To The End Of AddressBar And Get Your Widget ID.
Please tell me how i can increase width of border
JUst Change
border: 1px solid #ff0000;Withborder: 5px solid #ff0000;.