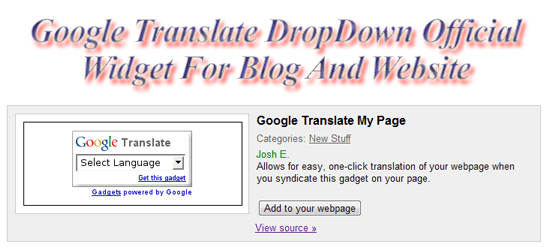
Google Translate gadget is a simple web gadget that you can customize and add to your website that automatically translates your web pages to many different languages. I’m sure that we are all not from the same country, and we all can’t read and understand all languages in the world, and as a blogger my self, sometimes i want to translate some blogs from various languages to English. The usual way is to copy the page url and then i go to google translate service and paste the url there then hit enter.
We can all short cut all this steps for our visitors by adding a great widget to our blog and website. it’s easy and one step trick. If you run a website or a blog, these days, it becomes almost a necessity to make sure that your web site or blog can be read by people around the world. And that means to make sure your website or blog is available in many different languages other than English. Do you have to learn all those languages to make your website available in all those languages? Of course, not.

As of this writing Google Translate Gadget supports 35 different languages and the cool thing about this gadget is that it doesn’t take much page real-estate on your web page. Google Translate Gadget has just a simple logo and a dropdown list of languages you can choose from. If you’ve been using any other translation gadgets/widgets you might have to read this article to make sure you are using the one that takes less screen space and doesn’t download 35 different flag images to represent each language.
Table of Contents
Features:
1.)This Widget Auto Detect Your Blog/Website Language And Translate It To The Readers Chosen Language.
2.)Support 35 Different Languages, English, French, Germany, Spanish, Italian, Dutch, Brazilian, Russian, Japanese, Korean, Arabic And Chinese.
3.) Auto Adjustment, No Matter Where Do You Add This Widget, It’ll Be Auto Adjusted With Your Blog Template.
4.) Easy To Install.
5.) Quick To Load.
6.) Full Customizable.
7.) Google Official Widget.
How To Add In Blogspot?
1.) Go To Your www.blogger.com
2.) Open Your Desire Blog.
3.) Go To “Layout“.
4.) Click “Add A Gadget” Where You Want To Add It.
5.) Now Scroll To “HTML-JAVASCRIPT“
6.) Click “+” Icon To Add It.
7.) Now Copy The Below Code And Paste It To There.
8.) Leave The Title Empty.
9.) Click Save, Now You Are Done.
How To Add In Website?
1.) Just Go To Your HTML File.
2.) Now Copy The Below Code And Paste It Between <body> </body>.
3.) Save It, Now You Are Done.
Customization:
1.) Customize It At The Google Page.


You’re much welcome, Chan. It’s my pleasure you find the tutorial useful.
Thanks For Visiting Us And Leaving Your Review…
Thank you for sharing a explanatory article regarding Google Translate Widget for Blogger. i have already used my blog, i have been getting positive result from my readers. it help to break the language barriers and people can read blog on their own languages. its really easy to installed this services on blogger blogspot.com. Google provide this easy services for every blogger. i have got some nice features on this services which was mention in this post. i really appreciate for great efforts.
You Are Welcome To Visit Us And Thanks For Leaving Your Review About It So Other Can Also Get Help From It…
Yeah I impressed by your blogpost as describes about the venue facility. I also searches for many and found many results and one of the results are over here. Thanks for sharing information.
You Are Welcome And Thanks For Your View About Us, Be With Us To Get More…
Thanks for such a lovely idea brother i have putted on my blog.
You Are Welcome Here And Thanks For Using Our Tuotorial…
This blog is really informative i really had fun reading it.
Thanks For Liking Our Blog And Leaving Your Views About Us…