

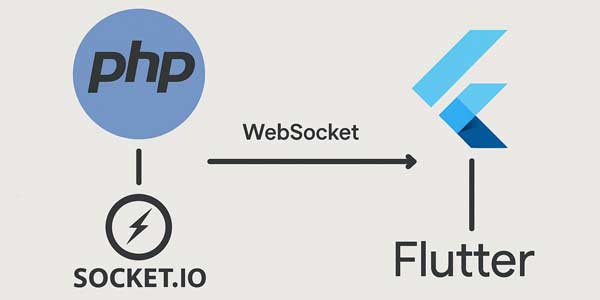
Real-time communication is a crucial feature in modern applications. Whether you’re building a chat app, live notifications, or a collaborative tool, Socket.IO provides an efficient way to handle real-time updates. In this guide, we’ll walk through creating a Socket.IO server using PHP and connecting it to a Flutter application.
Table of Contents
Why Use Socket.IO For Real-Time Communication?
Socket.IO is a popular library that enables real-time, bidirectional communication between clients and servers. It works seamlessly across different platforms and provides fallback mechanisms for environments where WebSockets aren’t supported.
“Socket.IO simplifies real-time web applications by abstracting the complexities of WebSockets and providing additional features like rooms, namespaces, and automatic reconnection.”
Key Benefits Of Socket.IO
- Cross-Platform Compatibility: Works on web, mobile, and desktop applications.
- Automatic Reconnection: Handles connection drops gracefully.
- Event-Based Communication: Easy to implement custom events.
- Scalability: Supports horizontal scaling with adapters like Redis.
Setting Up A Socket.IO Server With PHP
While Socket.IO is traditionally used with Node.js, we can leverage PHP using the elephant.io library or a Node.js intermediary. Here, we’ll use a hybrid approach.
Prerequisites
- PHP 7.4+ installed
- Composer for dependency management
- Node.js and npm (for the Socket.IO server)
- Basic knowledge of PHP and JavaScript
Step 1: Install The Required Packages
First, we’ll set up a basic Node.js server to handle Socket.IO connections:
npm init -y
npm install express socket.io
For PHP integration, we’ll use elephant.io:
composer require wisembly/elephant.io
Step 2: Create The Node.js Socket.IO Server
Create a file named server.js with the following content:
const express = require('express');
const app = express();
const http = require('http').createServer(app);
const io = require('socket.io')(http, {
    cors: {
        origin: "*",
        methods: ["GET", "POST"]
    }
});

io.on('connection', (socket) => {
    console.log('A user connected');

    socket.on('chat message', (msg) => {
        io.emit('chat message', msg);
    });

    socket.on('disconnect', () => {
        console.log('User disconnected');
    });
});

http.listen(3000, () => {
    console.log('Socket.IO server running on port 3000');
});
Step 3: Connect PHP To The Socket.IO Server
Create a PHP file to interact with our Socket.IO server:
<?php
require __DIR__.'/vendor/autoload.php';

use ElephantIO\Client;
use ElephantIO\Engine\SocketIO\Version2X;

$client = new Client(new Version2X('http://localhost:3000'));

$client->initialize();
$client->emit('chat message', ['text' => 'Hello from PHP!']);
$client->close();
Connecting Flutter To The Socket.IO Server
Now that our server is running, let’s connect a Flutter application to it.
Prerequisites For Flutter
- Flutter SDK installed
- Basic knowledge of Dart programming
socket_io_clientpackage
Step 1: Add Dependencies
Add the following to your pubspec.yaml:
dependencies:
  socket_io_client: ^2.0.0
Step 2: Implement Socket.IO Connection In Flutter
Create a basic Flutter widget to handle the connection:
import 'package:flutter/material.dart';
import 'package:socket_io_client/socket_io_client.dart' as IO;

class ChatScreen extends StatefulWidget {
    @override
    _ChatScreenState createState() => _ChatScreenState();
}

class _ChatScreenState extends State<ChatScreen> {
    late IO.Socket socket;
    final TextEditingController _controller = TextEditingController();
    final List<String> _messages = [];

    @override
    void initState() {
        super.initState();
        connectSocket();
    }

    void connectSocket() {
        socket = IO.io('http://your-server-ip:3000', <String, dynamic>{
            'transports': ['websocket'],
            'autoConnect': false,
        });

        socket.connect();

        socket.onConnect((_) {
            print('Connected to Socket.IO server');
        });

        socket.on('chat message', (data) {
            setState(() {
                _messages.add(data['text']);
            });
        });
    }

    void _sendMessage() {
        socket.emit('chat message', {'text': _controller.text});
        _controller.clear();
    }

    @override
    Widget build(BuildContext context) {
        return Scaffold(
            appBar: AppBar(title: Text('Socket.IO Chat')),
            body: Column(
                children: [
                    Expanded(
                        child: ListView.builder(
                            itemCount: _messages.length,
                            itemBuilder: (ctx, i) => ListTile(
                                title: Text(_messages[i]),
                            ),
                        ),
                    ),
                    Padding(
                        padding: const EdgeInsets.all(8.0),
                        child: Row(
                            children: [
                                Expanded(
                                    child: TextField(
                                        controller: _controller,
                                        decoration: InputDecoration(
                                            hintText: 'Type a message',
                                        ),
                                    ),
                                ),
                                IconButton(
                                    icon: Icon(Icons.send),
                                    onPressed: _sendMessage,
                                ),
                            ],
                        ),
                    ),
                ],
            ),
        );
    }

    @override
    void dispose() {
        socket.disconnect();
        super.dispose();
    }
}
Testing The Complete Setup
To verify everything works correctly:
- Run the Node.js server:
node server.js - Execute your PHP script to send a test message
- Launch your Flutter app and test the chat functionality
Troubleshooting Common Issues
If you encounter problems, check these common solutions:
- Connection Errors: Ensure your server IP is correct and ports are open
- CORS Issues: Verify your Socket.IO server has proper CORS configuration
- Firewall Blocks: Check if your firewall is blocking the port (3000 by default)
Advanced Features To Implement
Once you have the basic setup working, consider adding these enhancements:
Authentication
Secure your Socket.IO connections with JWT or session-based authentication:
// Node.js server
io.use((socket, next) => {
    const token = socket.handshake.auth.token;
    if (verifyToken(token)) {
        return next();
    }
    return next(new Error('Authentication error'));
});
Rooms And Namespaces
Organize connections into logical groups:
socket.on('join room', (room) => {
    socket.join(room);
});

socket.on('room message', ({room, msg}) => {
    io.to(room).emit('room message', msg);
});
Scalability With Redis
For production environments, use Redis to scale across multiple servers:
npm install socket.io-redis
const redisAdapter = require('socket.io-redis');
io.adapter(redisAdapter({ host: 'localhost', port: 6379 }));
Performance Considerations
Optimize your real-time application with these tips:
- Limit the frequency of high-volume events
- Compress large payloads before sending
- Implement client-side throttling
- Use binary protocols for media streaming
Conclusion
Building a Socket.IO server with PHP and connecting it to Flutter opens up numerous possibilities for real-time applications. While PHP isn’t the traditional choice for Socket.IO, our hybrid approach provides a practical solution. The Flutter implementation demonstrates how easily mobile apps can integrate with real-time features.
Remember to secure your implementation, especially for production use, and consider scalability from the beginning. With this foundation, you can expand to build sophisticated real-time features like collaborative editing, live tracking, or instant notifications.


wonderful content. very helpful and useful content.
Welcome here and thanks for reading our article and sharing your view. This will be very helpful to us to let us motivate to provide you with more awesome and valuable content from a different mind. Thanks again.
Thanks for this detailed and beginner-friendly walkthrough! The hybrid approach using PHP and Node.js for real-time communication is super insightful. Just wondering—how would you recommend handling message queuing or retries in case of temporary server disconnects on the Flutter side?
Welcome here and thanks for reading our article and sharing your view. This will be very helpful to us to let us motivate to provide you with more awesome and valuable content from a different mind. Thanks again.